本文实例为大家分享了Unity3D Shader实现扫描显示的具体代码,供大家参考,具体内容如下
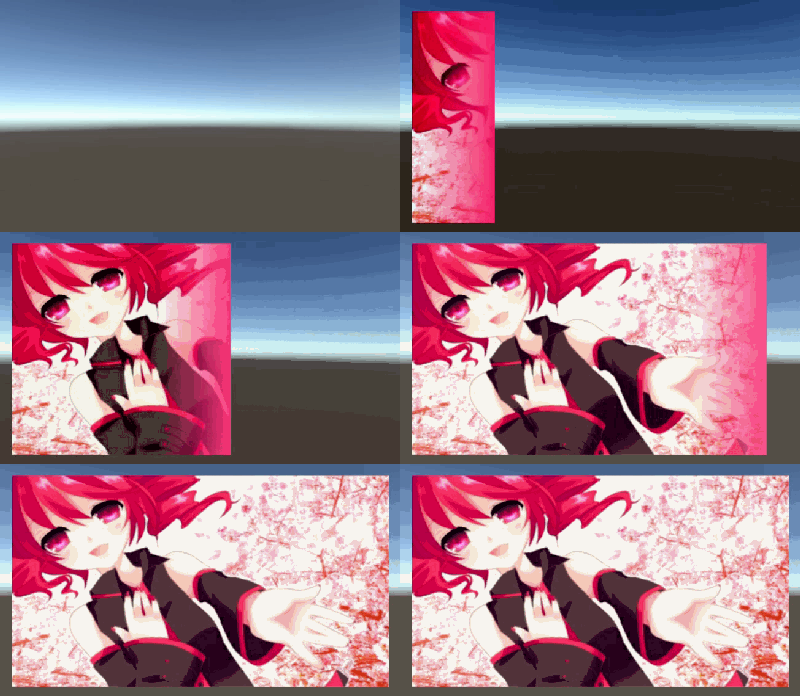
通过Shader实现,从左向右的扫描显示,可自定义扫描颜色、宽度、速度。
效果图如下

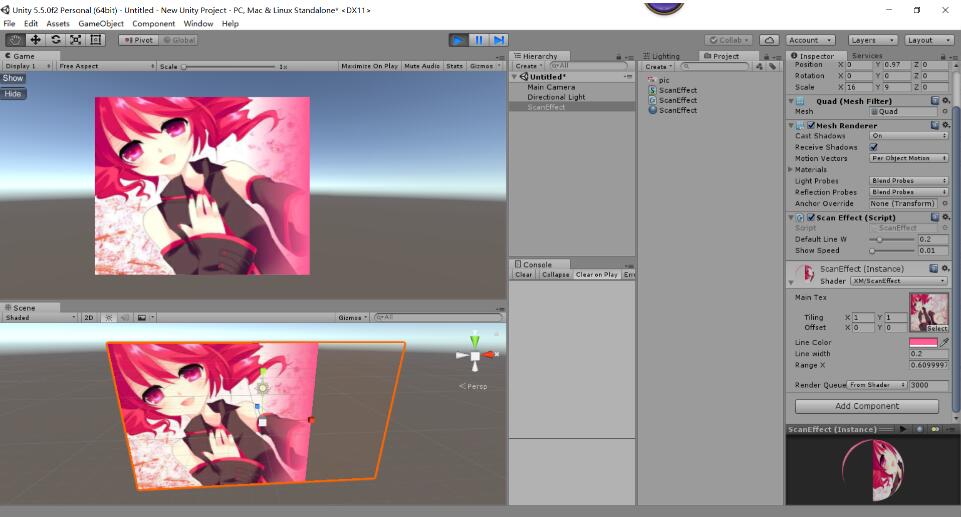
编辑器界面如下

Shader源码如下
|
1
2
3
4
5
6
7
8
9
10
11
12
13
14
15
16
17
18
19
20
21
22
23
24
25
26
27
28
29
30
31
32
33
34
35
36
37
38
39
40
41
42
43
44
45
46
47
48
49
50
51
52
53
54
55
56
57
58
59
60
61
62
63
64
65
66
67
68
69
70
71
72
73
74
75
76
77
78
79
80
|
Shader "XM/ScanEffect"{ Properties { _MainTex("Main Tex", 2D) = "white"{} _lineColor("Line Color", Color) = (0,0,0,0) _lineWidth("Line width", Range(0, 1.0)) = 0.1 _rangeX("Range X", Range(0,1.0)) = 1.0 } SubShader { Tags { "Queue" = "Transparent" } ZWrite Off Blend SrcAlpha OneMinusSrcAlpha Cull back Pass { CGPROGRAM #pragma vertex vert #pragma fragment frag #include "Lighting.cginc" sampler2D _MainTex; float4 _MainTex_ST; float4 _lineColor; float _lineWidth; float _rangeX; struct a2v { float4 vertex : POSITION; float4 texcoord : TEXCOORD0; }; struct v2f { float4 pos : SV_POSITION; float2 uv : TEXCOORD0; }; v2f vert(a2v v) { v2f o; o.pos = mul(UNITY_MATRIX_MVP, v.vertex); o.uv = TRANSFORM_TEX(v.texcoord, _MainTex); return o; } fixed4 frag(v2f i) : SV_TARGET { fixed4 col = tex2D(_MainTex, i.uv); if(i.uv.x > _rangeX) { clip(-1); } else if (i.uv.x > _rangeX - _lineWidth) { float offsetX = i.uv.x - _rangeX +_lineWidth; fixed xAlpha = offsetX / _lineWidth; col = col * (1 - xAlpha) + _lineColor * xAlpha; } return col; } ENDCG } } FallBack "Diffuse"} |
代码调用如下
|
1
2
3
4
5
6
7
8
9
10
11
12
13
14
15
16
17
18
19
20
21
22
23
24
25
26
27
28
29
30
31
32
33
34
35
36
37
38
39
40
41
42
43
44
45
46
47
48
49
50
51
52
53
54
55
56
57
58
59
60
61
62
63
64
65
66
67
68
69
70
71
72
73
74
75
76
77
78
79
80
81
82
83
84
85
86
|
using UnityEngine;using System.Collections;public class ScanEffect : MonoBehaviour{ //默认扫描线的宽 [Range(0,1)] public float _defaultLineW = 0.2f; //扫描的速度 [Range(0, 1)] public float _showSpeed = 0.02f; private MeshRenderer _render; private void Awake() { _render = GetComponent<MeshRenderer>(); SetX(0); SetLineWidth(0); } public void SetLineWidth(float val) { _render.material.SetFloat("_lineWidth", val); } public void SetX(float val) { _render.material.SetFloat("_rangeX", val); } public void Show() { StopCoroutine("Showing"); StartCoroutine("Showing"); } public void Hide() { StopCoroutine("Showing"); SetX(0); SetLineWidth(0); } private IEnumerator Showing() { float deltaX = 0; float deltaWidth = _defaultLineW; SetX(deltaX); SetLineWidth(deltaWidth); while (true) { if (deltaX != 1) { deltaX = Mathf.Clamp01(deltaX + _showSpeed); SetX(deltaX); } else { if (deltaWidth != 0) { deltaWidth = Mathf.Clamp01(deltaWidth - _showSpeed); SetLineWidth(deltaWidth); } else { break; } } yield return new WaitForEndOfFrame(); } } public void OnGUI() { if (GUILayout.Button("Show")) { Show(); } if (GUILayout.Button("Hide")) { Hide(); } }} |
以上就是本文的全部内容,希望对大家的学习有所帮助,也希望大家多多支持服务器之家。
原文链接:https://blog.csdn.net/u012741077/article/details/53386209


